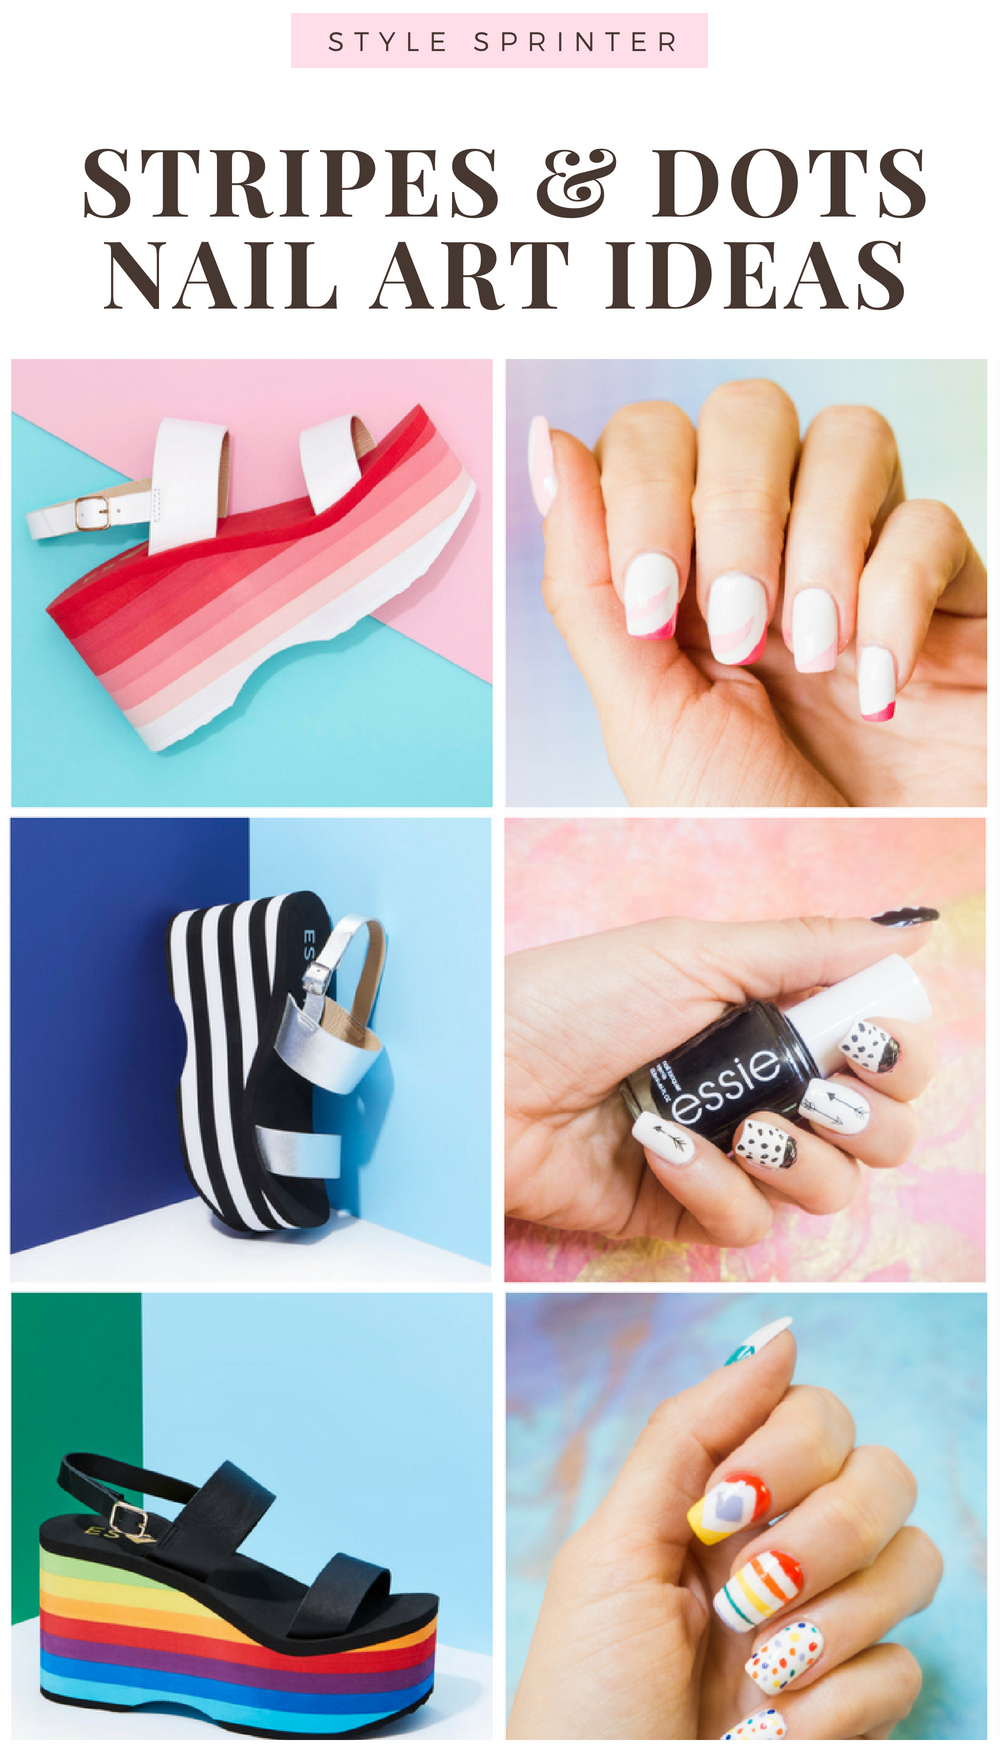


Every summer I try experimenting with nail art as it’s an easy and fun way to elevate your look for the holidays. While last year I was all about patriotic nail art, this season I decided to try something new and match my nails with the design of my stripe and polka dot shoes.
If you remember my Hamptons Packing Post or my July Fourth Lookbook, you know that I’m obsessed with summer shoe designs from the ESxRD Collection. These colorful stripe sandals and flip-flops really standout and perfectly match my bright color obsessed personality.
Inspired by these trendy sandals, I collaborated with Rocket Dog to put together three nail art tutorials that are super fun looking and not that difficult to repeat.
But before we begin, I’d like to hear more about your nail art experiences. Do you experiment with different shades of nail polishes? How often do you change it and what are some of the designs you usually stick to? Please share your ideas in the comments area below! Also, don’t forget to check out my latest post where I share some of the outfit ideas for the upcoming long weekend.
Ombre Crescent Moons

This nail art design is inspired by my favorite ESxRD Copa Pink & White Platform Sandals that I can’t stop wearing. Maybe I’m just obsessed with all things pink, but this shoe design really speaks to me. I love how it gradually goes from white to red with all the halftones in between. I tried recreating such design on my nails by using nail polish in the same color group and decided to pick half-moon nail art stencils to make the design pop even more.
Step 1: Start by applying two coats of Essie in #008 Blanc. Let it dry for at least an hour before using stencils so you don’t have imprints left on your nails.
Step 2: For this project, you will need nail stencils in a half-moon shape. I picked mine from a local pharmacy, but there are many under $3 (and even under $1) options at Walmart so definitely check them out. Apply one to two stencils on each nail and press firmly.
Step 3: I decided to stick to just two colors, but you can use as many as you wish. Light pink shade is Sally Hansen Hard as Nails XTreme Wear in #199 Tickled Pink. Dark pink shade is Essie #74 Pansy.
Step 4: Allow nail polish to completely dry and then gently remove the stickers.
Step 5: Apply a topcoat, preferably the one that provides the shiny effect. My current favorite is Revlon Quick Dry Top Coat.
Where Dots Meet Rainbows
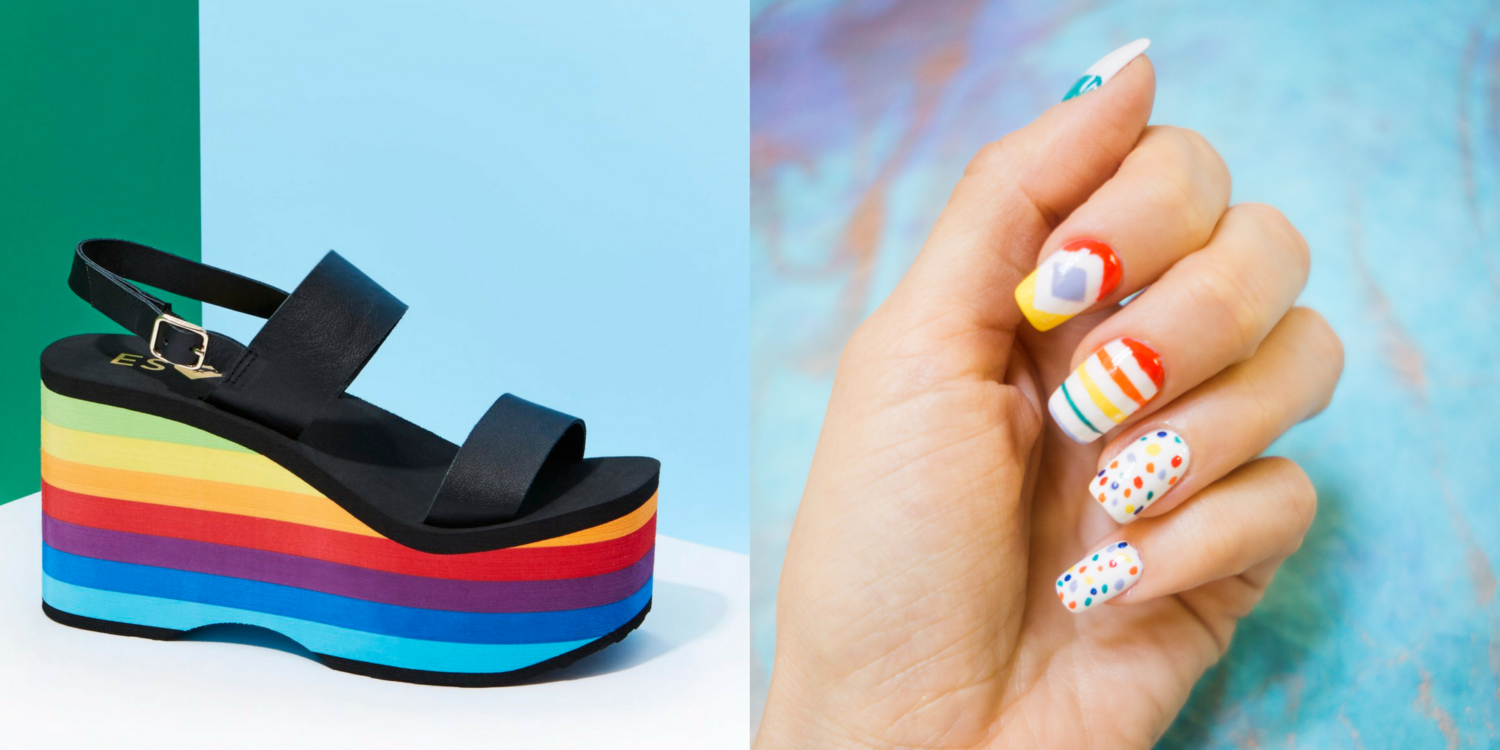
This next nail art project was inspired by ESxRD Paradise Leather Rainbow Sandal as it features a classic rainbow print that just screams “Summer”. I decided to think outside the box and deconstruct rainbow into a colorful polka dot print where you see all the same colors but in a completely different format.
While my nail art looked like a combination of many designs in one, feel free to use just one of the patterns while creating your nail art — or just go with white nails and just one nail decorated with stripes or dots.
Step 1: Start by applying two coats of Essie in #008 Blanc (can you tell it’s my favorite white nail polish?) Let it dry for at least an hour before using stencils so you don’t have imprints left on your nails.
Step 2: To create rainbow nail art, apply small stripe nail stencils across your nail and press them firmly. Use nail polishes of your choice starting from any shade of this sequence: red, orange, yellow, green, blue, indigo, and violet. My nails fit only five colors as I used the following nail polish shades:
- Red—Essie #536 Geranium
- Orange—Sinful Colors #1214 Feel The Vibe
- Yellow—Sinful Colors #1598 Yolo Yellow
- Green—Milani Color Statement #20 Tattle Teal
- Blue—Kokie Professional #NP49 Heavenly
Step 3: If you are more into polka dot design, use the exact same colors applied as tiny dots all over your nail bed. Make sure that your nail polish applicator contains the tiniest amount of product so you achieve small dots look and don’t spill the nail polish all over your design.
Step 4: Wait for at least 15 minutes until your nail art is completely dry and finish with a topcoat, Revlon Quick Dry Top Coat.
Monochrome Variety

With all colorful options out there, I decided to feature one black and white nail art options. For those girls who love sticking to classic color combos. This nail art idea was inspired by the design of ESxRD Copa Black and White Platform Sandal which transforms neutral black and white shades into a fashion statement. Similar to previous nail art idea, feel free to use all or just one of the designs to create your final nail art look.
Step 1: Start by applying two coats of Essie in #008 Blanc. Let it dry for at least an hour before using stencils so you don’t have imprints left on your nails.
Step 2: To create moon manicure, place a nail art stencil from Essence French Manicure Set close to cuticles and apply black nail polish. I used Essie #720 Licorice which is a super pigmented charcoal black shade. I also decided to add some dots so this nail art looks a bit more festive.
Step 3: For zig-zag nail art, I applied black nail polish on both sides of the stencil so the middle part remains white.
Step 4: Arrow manicure was the easiest to create as I just placed nail art stickers by NailBliss EZArt onto my nails and secured it with a coat of Smith & Cult Above It All Top Coat.
* * * * *
These were my July Fourth nail art ideas. I hope you were able to find some inspiration for the upcoming long weekend. Please let me know which design you liked the most. Also feel free to share photos and links to your blog post where you feature your nail art ideas!